Putting a 9.5" rear axle in a GX470
- Patrick Perry

- Nov 25, 2024
- 3 min read
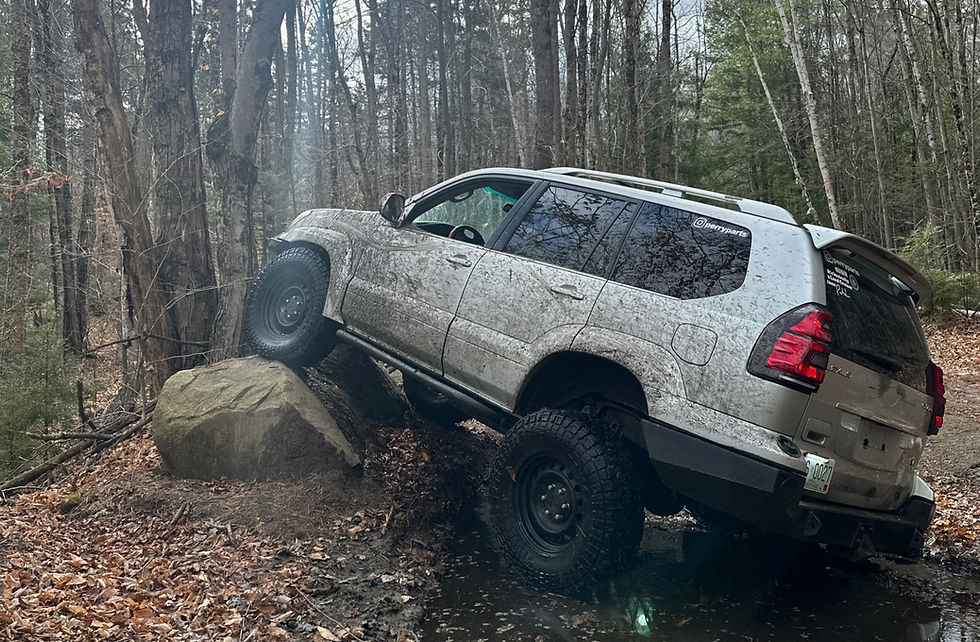
When we tackled Cruisers On The Rocks, we ended up destroying yet another 8-inch rear differential. This was the fourth one. If you do any serious off-roading with the GX 470 platform, you'll quickly notice the weakness of the 8-inch end on that truck.
This time was a bit different, though, because I was out wheeling with Land Cruiser enthusiasts – I was given the chance to acquire a Land Cruiser 100 series rear axle for a very low price. So that's what I did.
What follows is how I managed to retrofit the Land Cruiser 100 third member, gears, and more into the 8-inch rear axle setup – while keeping the ABS, six-lug wheels, parking brake, etc.
Important – liability disclaimer included at the bottom of article.
A quick little bit of Q&A –
Why not just transplant the 100 axle without cutting it up?
The 100 series, and 80 series rear axles have a different style of ABS tone ring – I wanted to retain ABS. Also, the 100 series has an offset pumpkin, requiring relocating the exhaust on the GX 470 platform.
What was the cost?
This swap was about $1000
Axle – $200
80 series locker – $250
Gears for the front differential – $350
Hardware, odds and ends - $200
Why 3-link?
More articulation, and simpler fitment - Also it allowed for reuse of the upper control arm mount.
How many miles on the setup so far?
3 wheeling trips and about 1000miles of road at time of blog publishing.
Bill of Materials, and more info at bottom of page. Now let's get into it.

We started by cutting the two axles – cutting guides below. Axles cut with axle shafts removed.

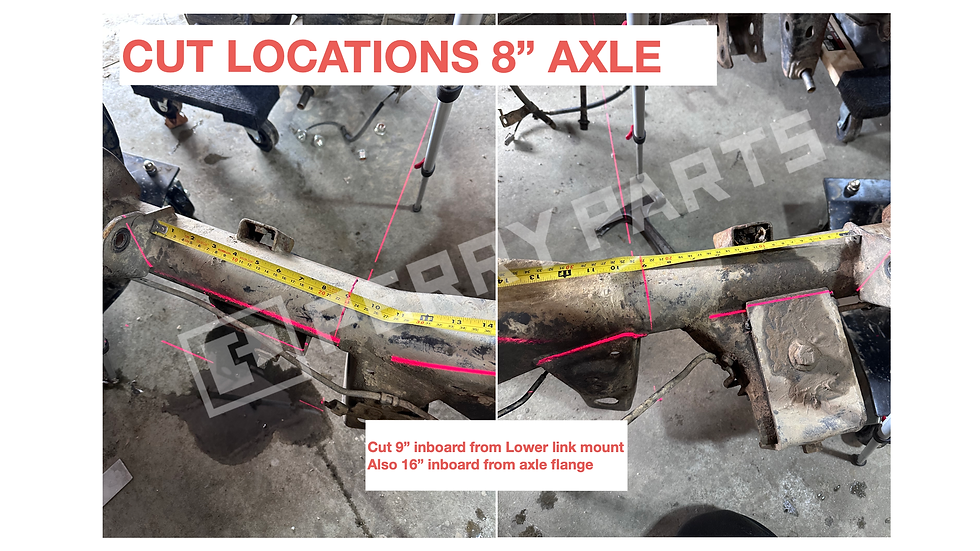
Once the axle is cut, it's time to install a steel sleeve to help with alignment and to help reinforce the cut area. Part number for the sleeve at the bottom of post.
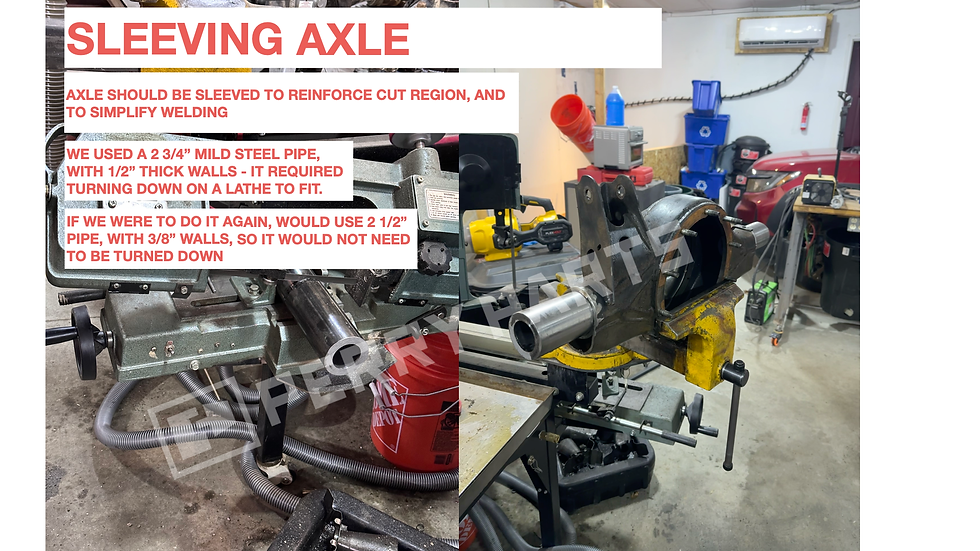
With the sleeve installed and the axle partially assembled – we began reassembling the axle. Reused the carrier for the 8 inch axle in order to align the spline ends of the axle shafts. The sleeve will help get orientation correct, but the imporant part is getting the wheel mount surfaces equal in position to each other.
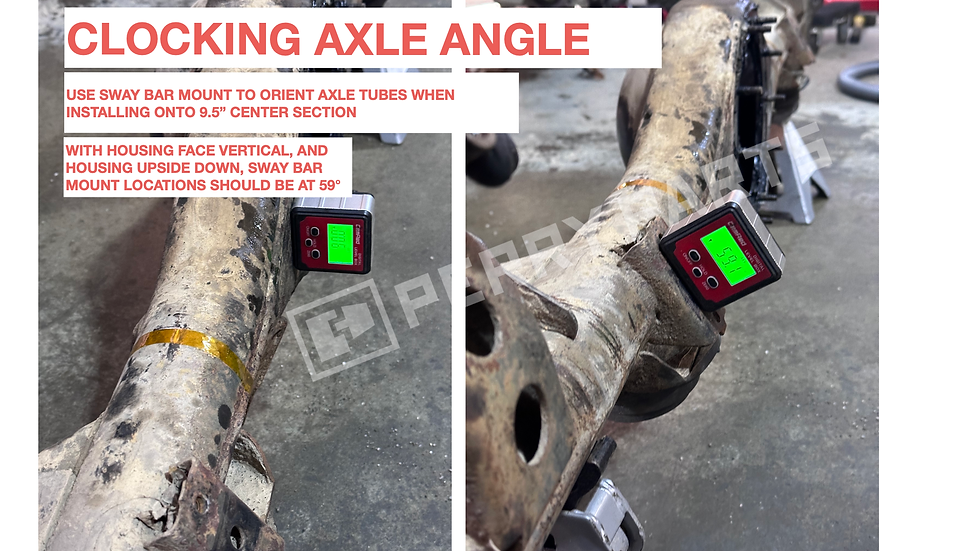
We ensured that the pumpkin is clocked relative to the axle tubes prior to any welding.

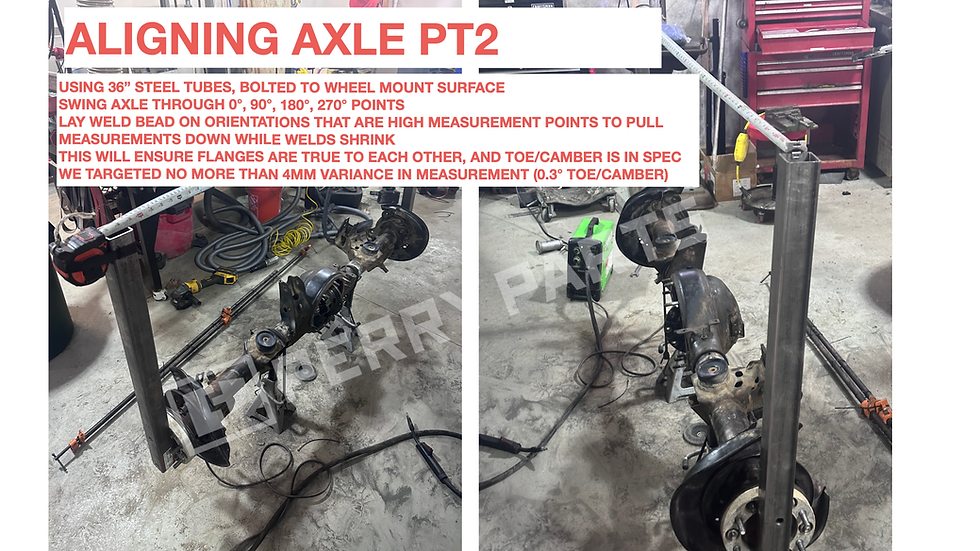
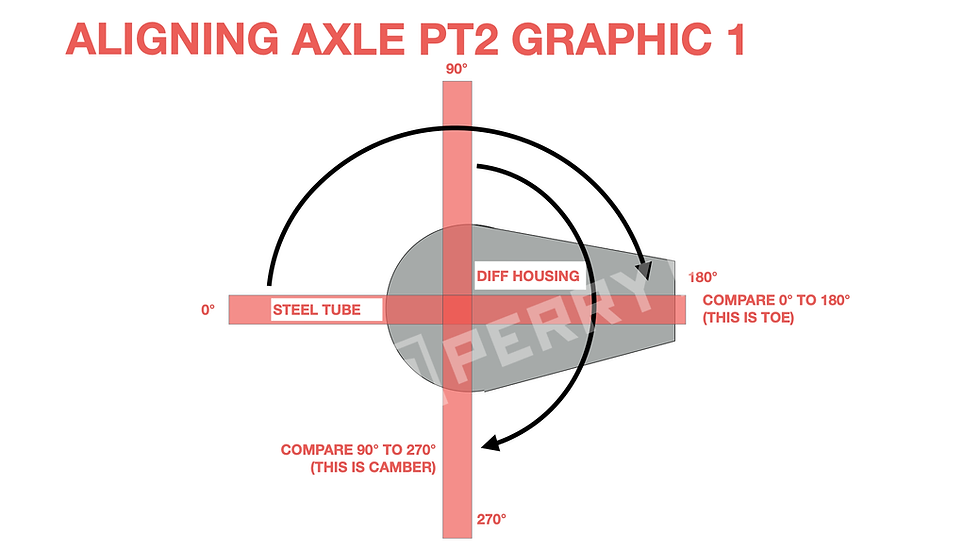
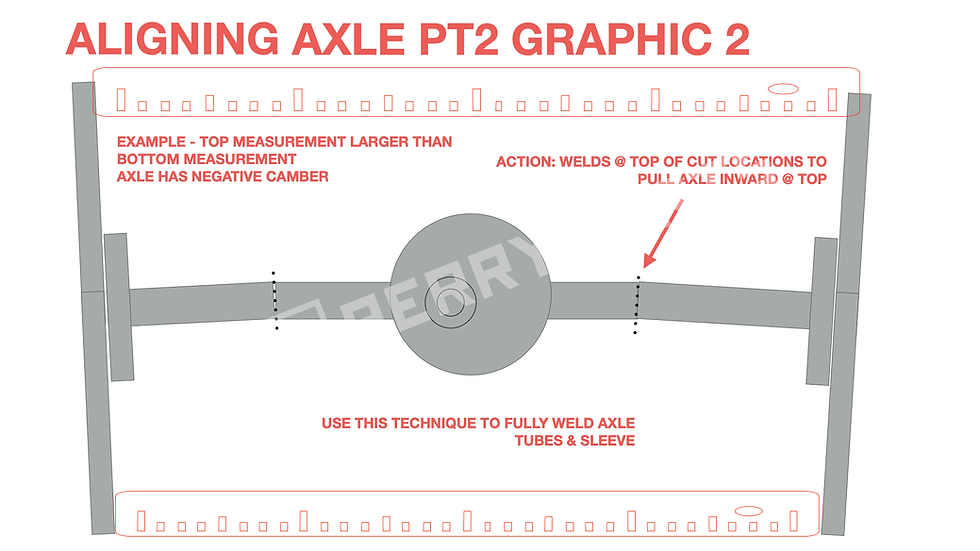
We chose to use gussets to help reinforce the cut region of the axle, and to just add some more beef to the whole assembly in general.

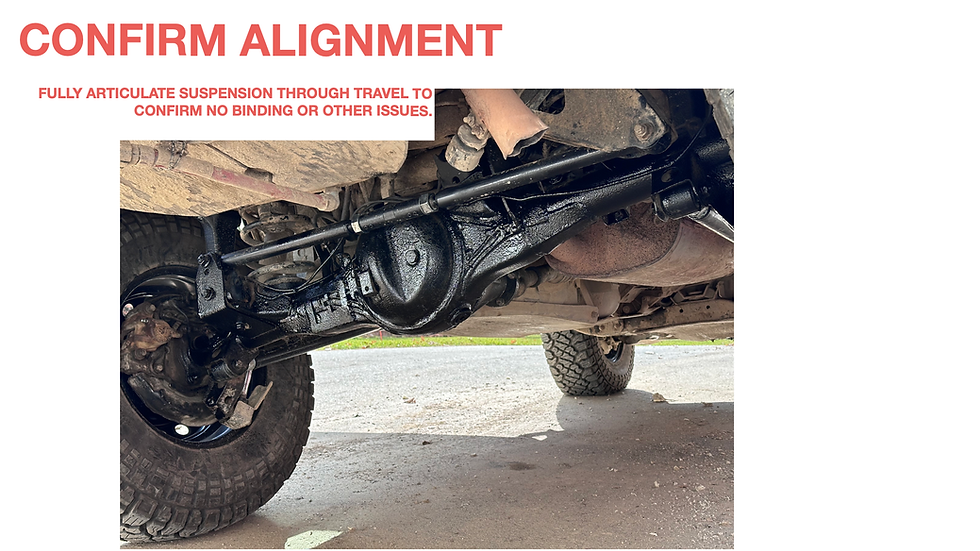
With the axle, fully assembled, gusseted, and partially assembled into the truck – the passenger side, upper control arm is bolted to the outside of the upper control arm mount from the 9.5 inch housing. Then a bolt is threaded through the entire stack and used to locate the position of the three link conversion mount.
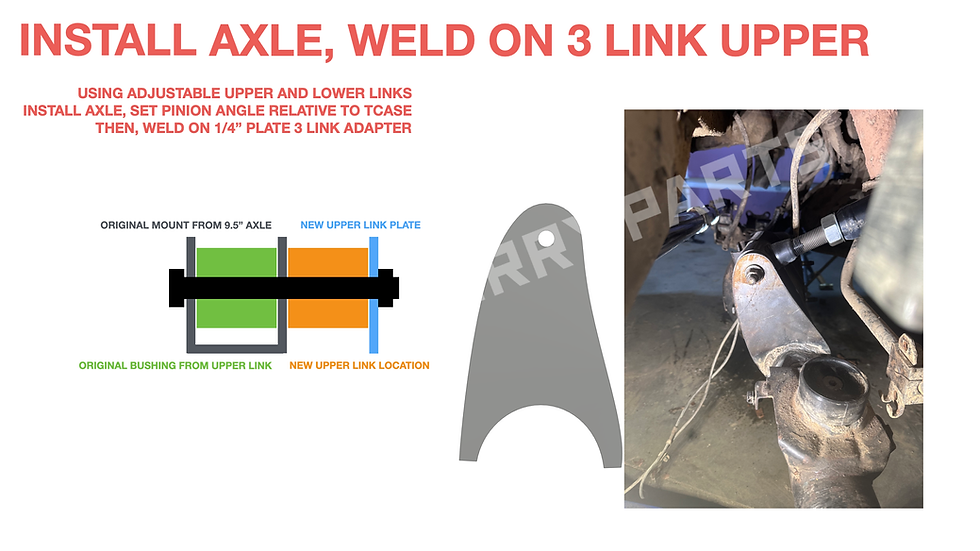
Aligned and ready for the trails
Important Disclaimer
By choosing to undertake this project, you acknowledge and agree that you assume all risks and liabilities associated with its execution. This guide is provided solely for informational and entertainment purposes and does not constitute professional advice.
It is your responsibility to ensure that all work is performed safely and in compliance with applicable laws, regulations, and best practices. Perry Parts explicitly disclaims any and all liability for injuries, damages, or losses arising from the use of this guide, whether followed as described or modified.
This guide is provided “as is,” without any warranties, express or implied, including but not limited to warranties of merchantability, fitness for a particular purpose, or non-infringement. Perry Parts shall not be held liable for any direct, indirect, incidental, or consequential damages resulting from the use or misuse of this guide.



Comments